
Exploring Neon’s database branching features
Learn how to leverage Neon's database branching functionalities to improve your development workflows and experience!

Neon provides a fully managed serverless Postgres service that separates compute and storage, offering developers scalable storage capabilities while minimizing costs. To fully understand the benefits of Neon, let’s take a closer look at the problem Neon solves.
Traditional Postgres deployments on cloud platforms like RDS or DigitalOcean involve virtual machines (VMs) with attached storage. For a production-grade application, developers and businesses usually need at least two VMs, each running a copy of the Postgres instance and sharing the same storage because Postgres is a monolith.
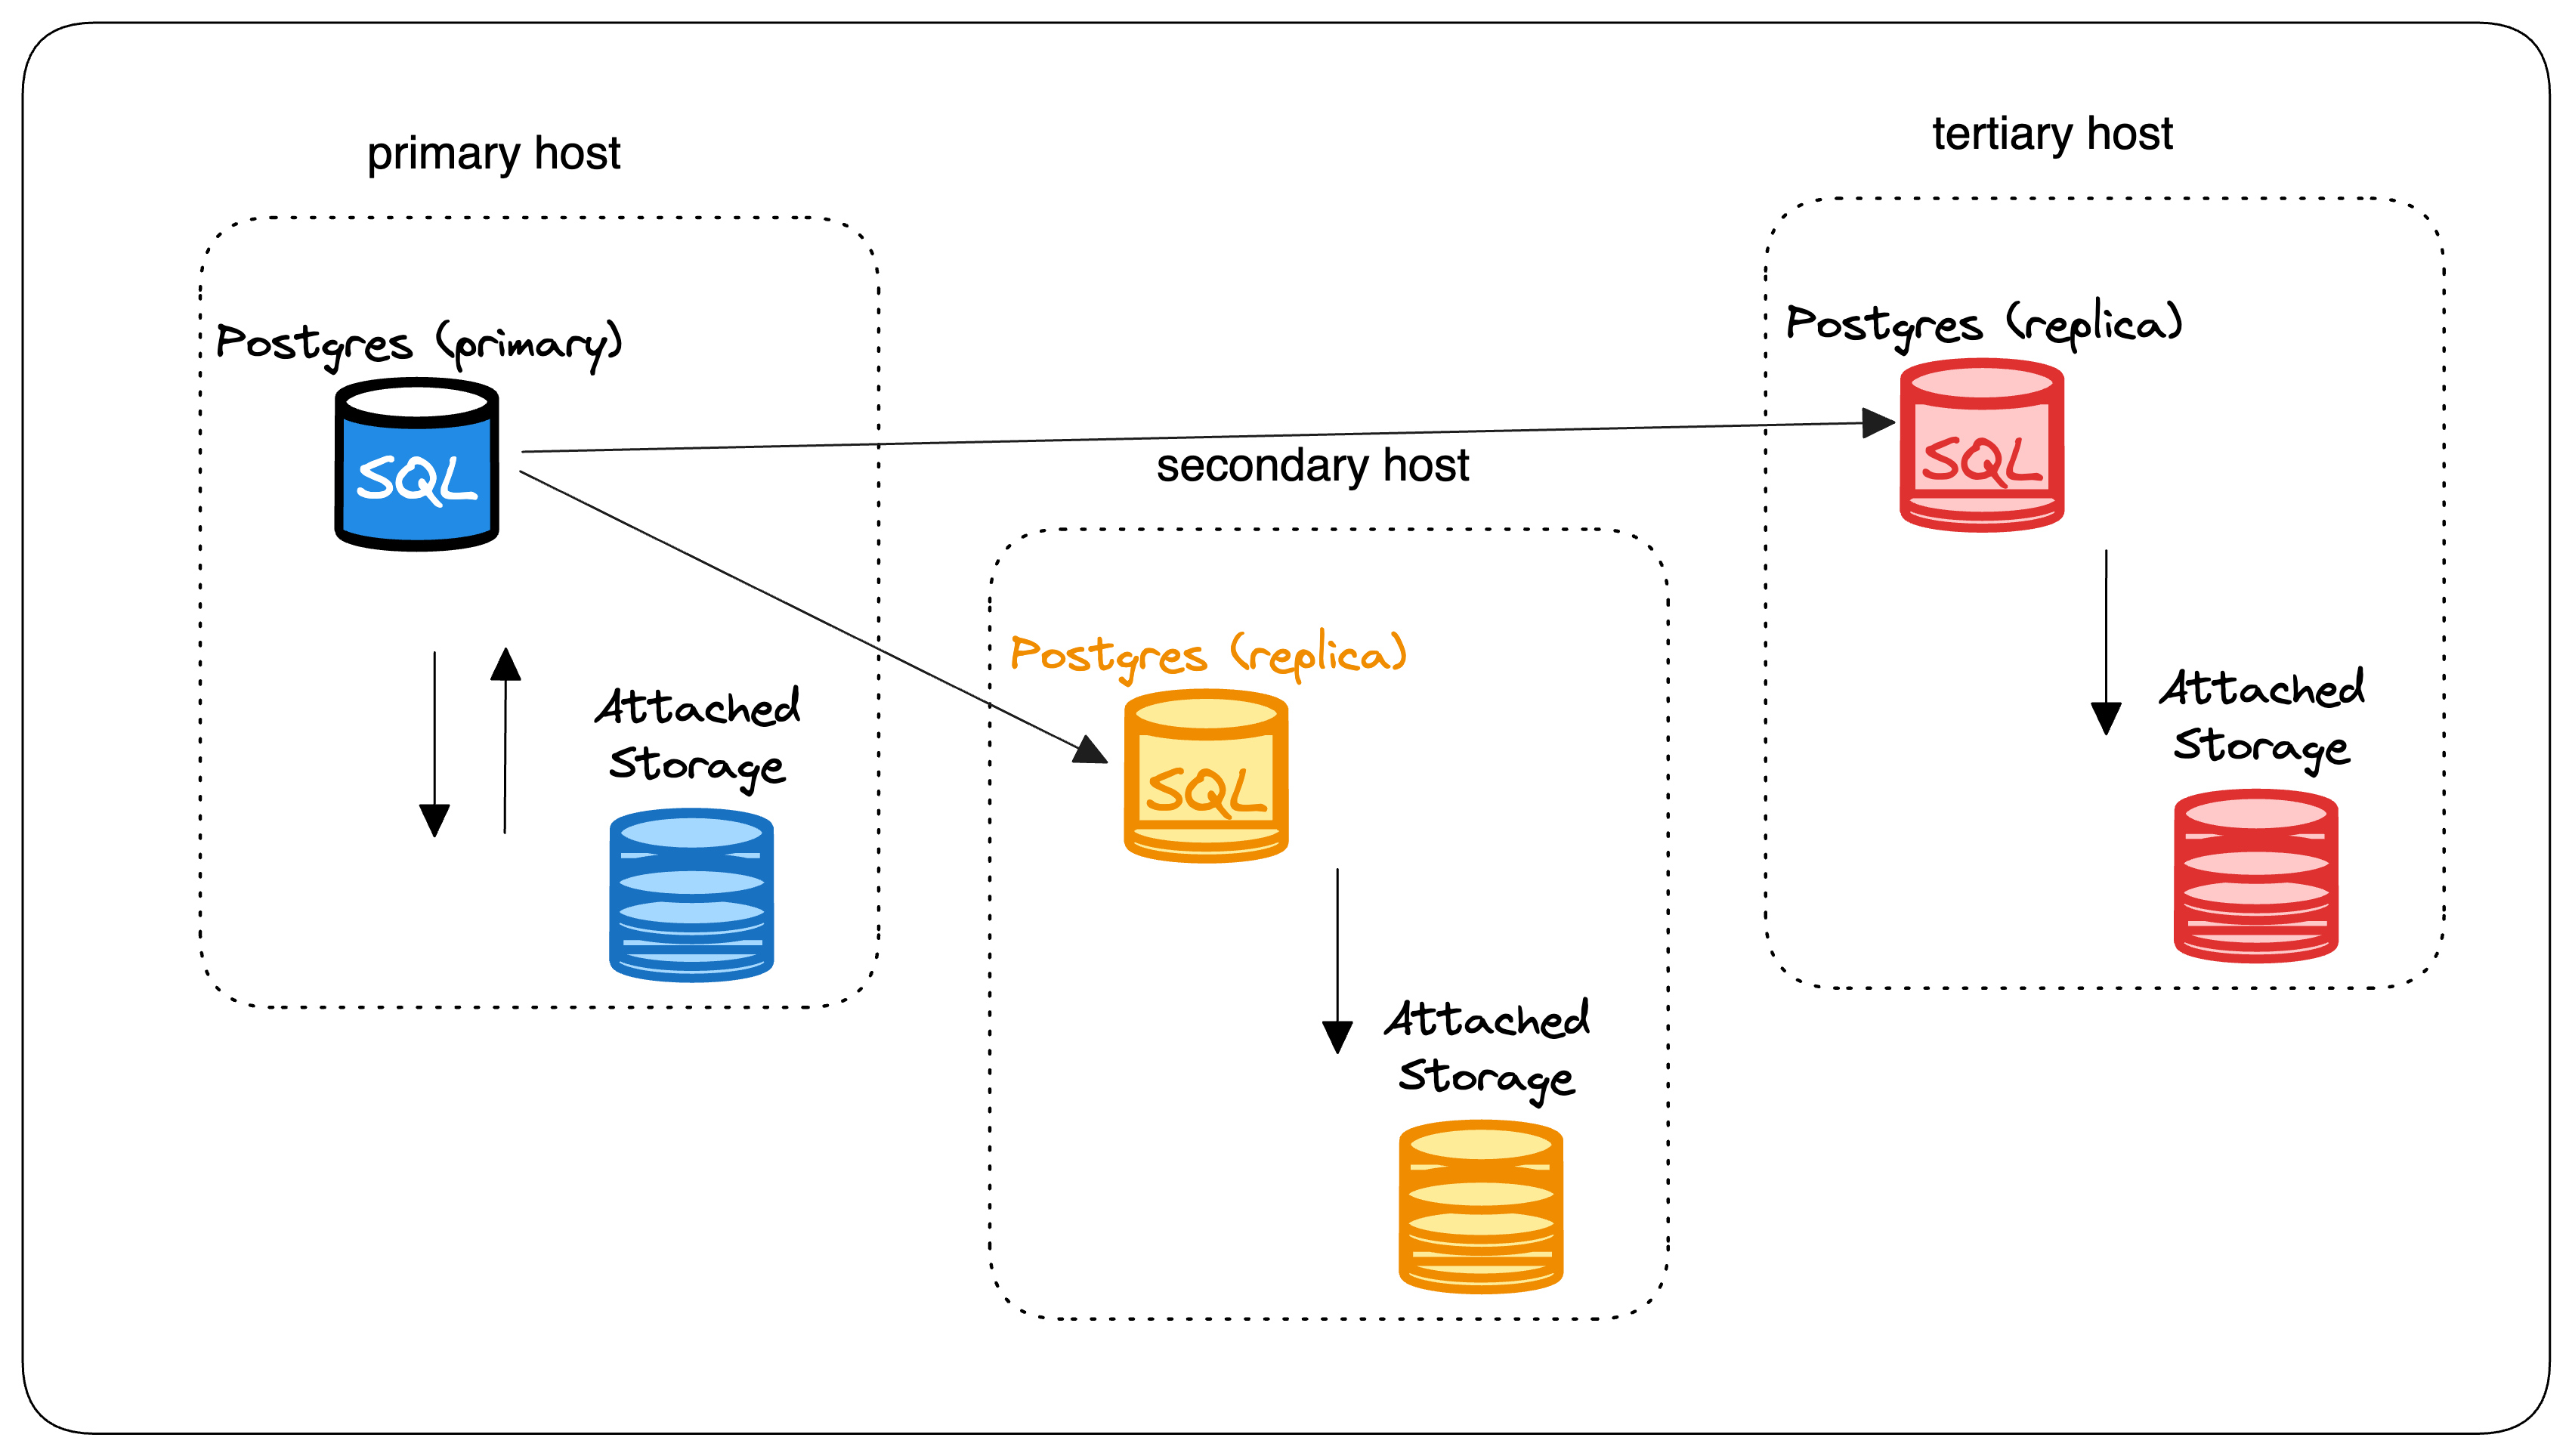
This architecture can be inefficient and expensive. It can also lead to over-provisioning, single points of failure, and high costs for EBS volumes. As a result, developers often have to deal with challenges like the following:
Downtimes: VM issues or shutdowns can cause unexpected downtimes.
Redundancy: Adding backup VMs for redundancy increases cost and complexity.
Overprovisioning: Unused storage and compute (bundled in the VM) during low-data periods lead to wasted resources.
Neon Serverless Postgres tackles these issues by separating storage and compute to offer such benefits as:
Stateless compute: Runs in containerized environments like Kubernetes, allowing dynamic resource allocation and scaling.
Infinite storage: Leverages S3 for cost-effective data storage, including cold data offload.
Fast startup: Launches Postgres instances in under 3 seconds.
Database branching: Enables easy branching and rollback of database states.
How does Neon work BTS?
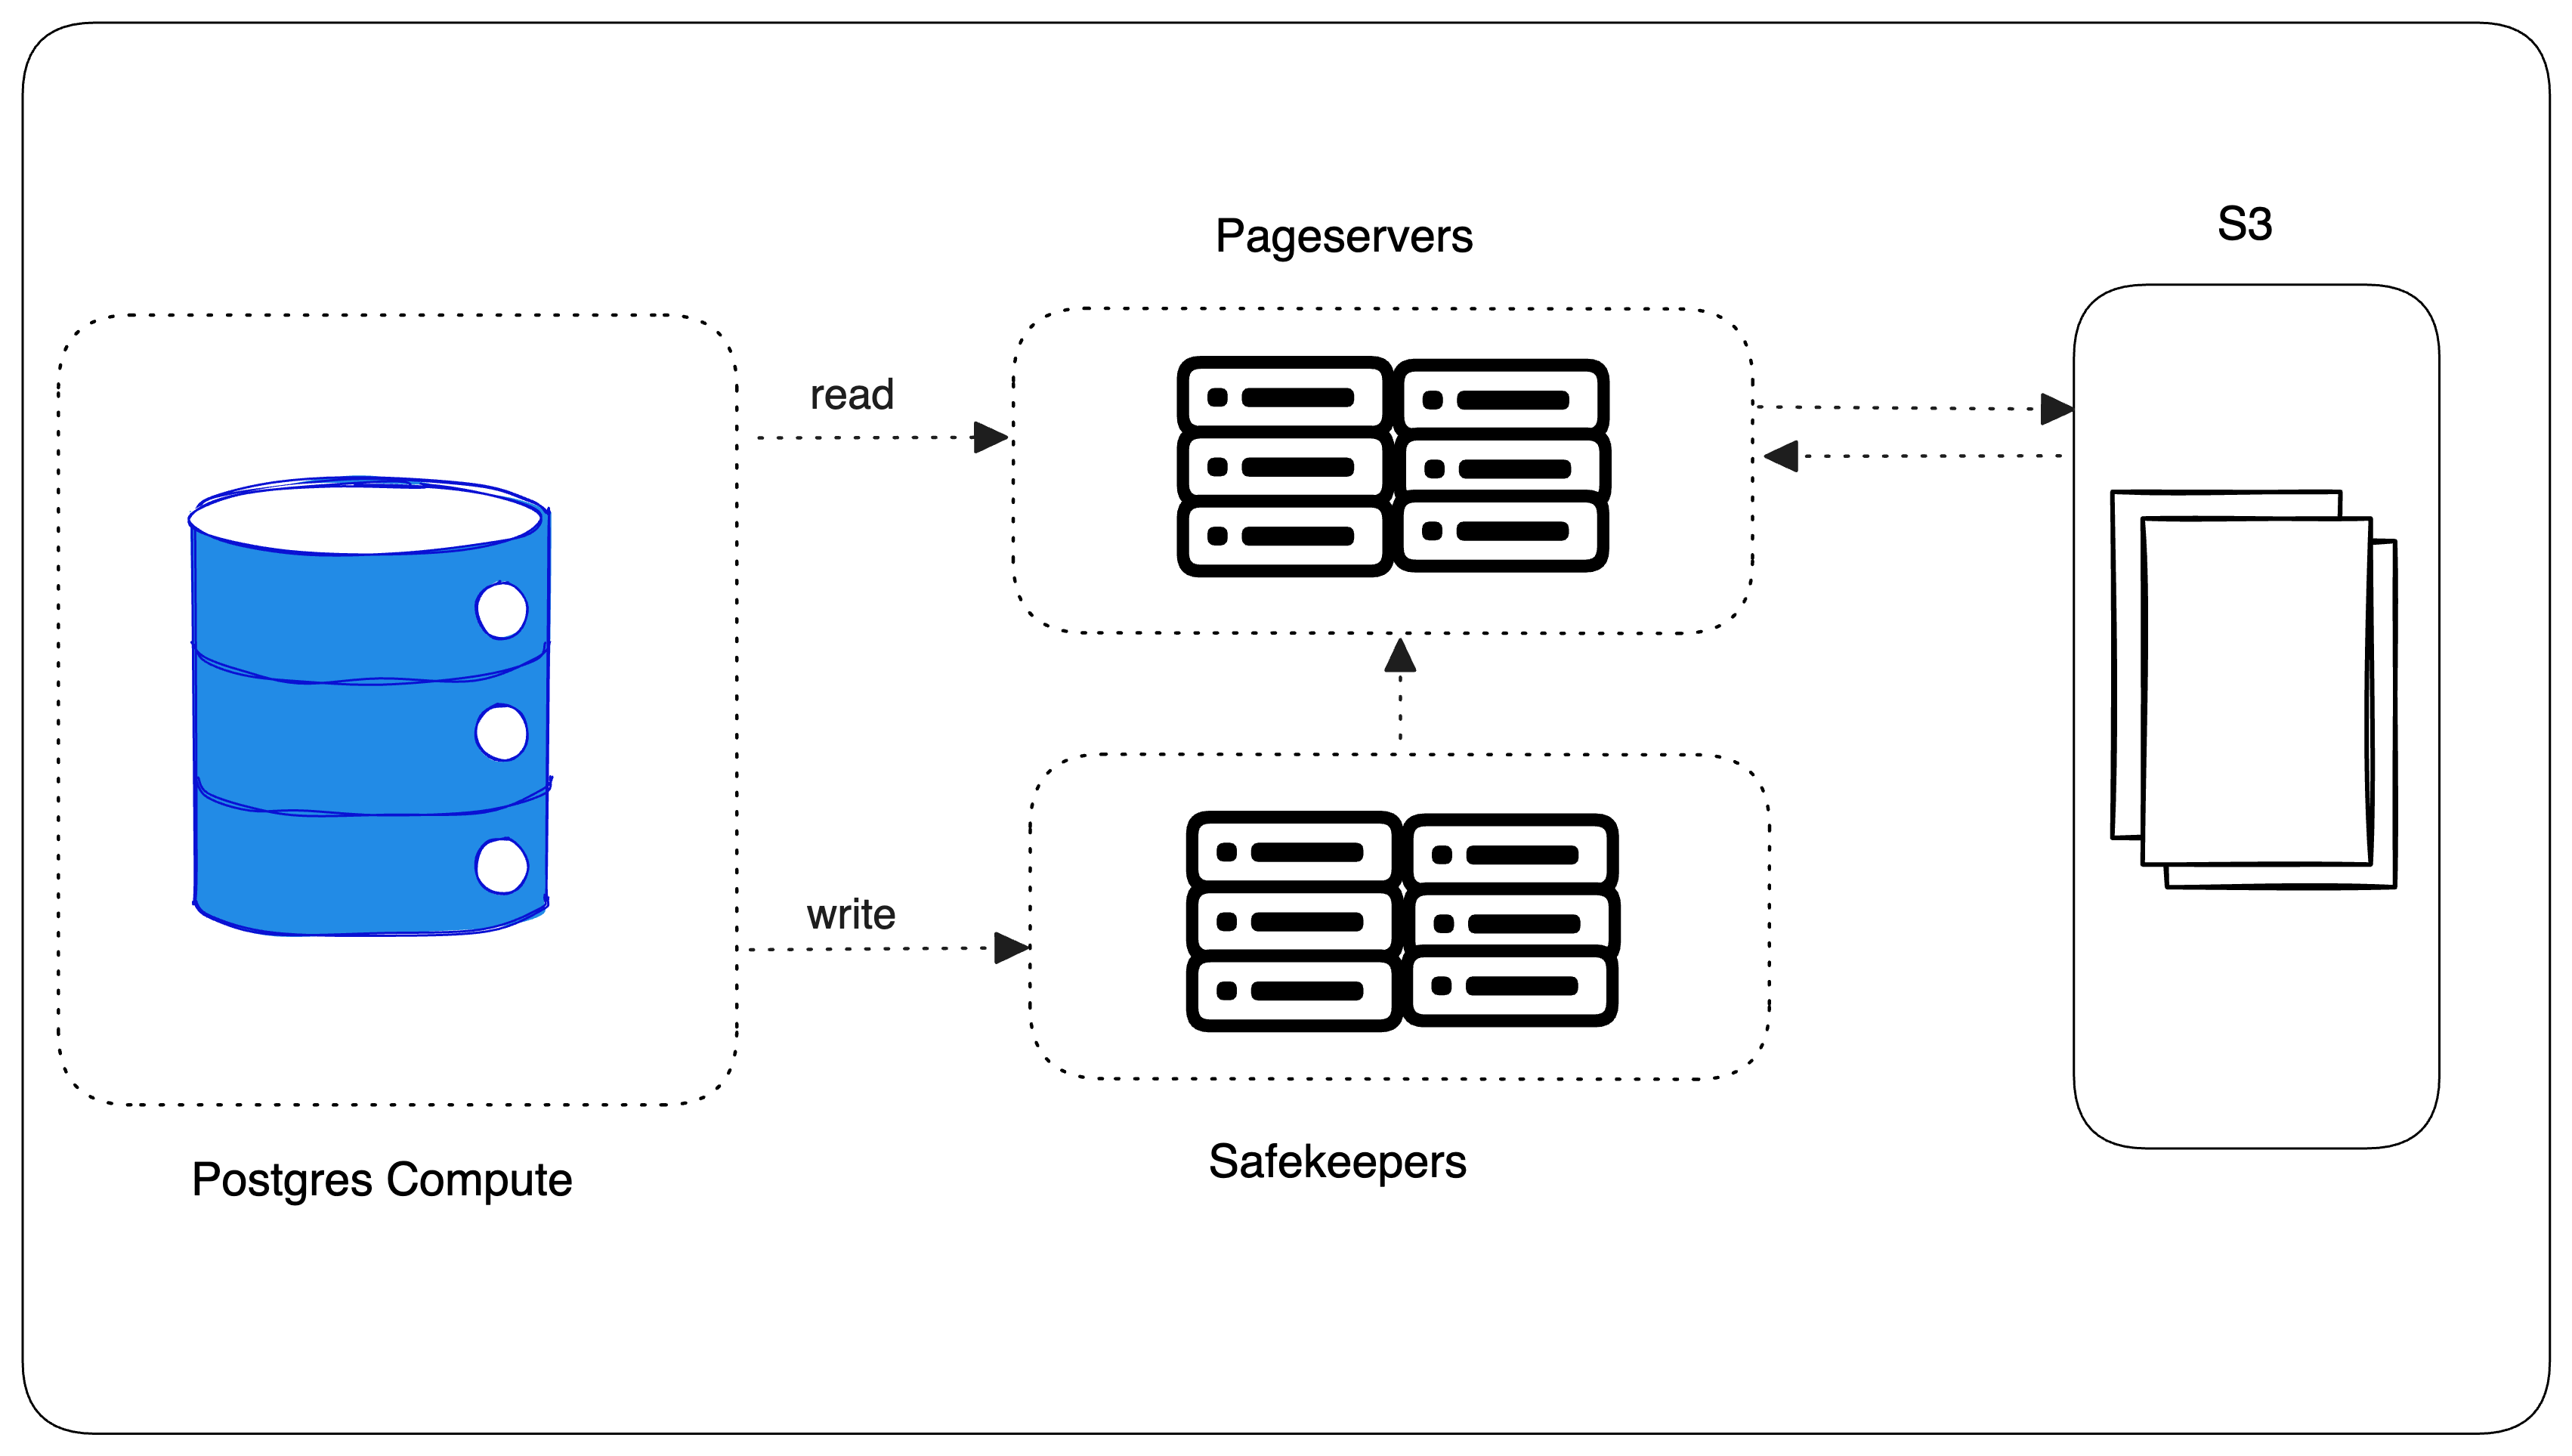
Three things: Pageservers, Safekeepers, and S3 integrations.
Pageservers: Instead of reading data directly from disk, Neon intercepts read requests and redirects them to a multi-tenant, regional Pageserver service. This service delivers data with lower latency and higher efficiency than traditional Postgres disk reads.
Safekeepers: Neon intercepts transaction log records and sends them to a separate Safekeepers service, also multi-tenant and regional. This offloads write workload and simplifies local operations.
S3 Integration: Both Pageservers and Safekeepers write data to S3 for persistent storage. S3's cost-effectiveness and scalability make it possible for Neon to offer infinite storage solutions to developers and businesses.
Benefits of this architecture for Developers:
Flexibility: Dynamically scale resources and manage deployments with containerization.
High availability: Stateless compute eliminates single points of failure and simplifies redundancy.
Cost efficiency: Pay only for used resources and benefit from S3's cost-effective storage.
Developer experience: Access features like database branching for streamlined development workflows.
As a result of these improvements, Neon is a compelling alternative to traditional Postgres deployments because it enables developers to build and manage databases with better flexibility, scalability, and cost efficiency. With this understanding, one of the biggest benefits that Neon’s architecture provides is the ability to handle database branching, which is what this post is all about. Let’s look at it in more detail.
Neon database branching
Because Neon can separate compute from storage, there’s flexibility to optimize storage and offer extended functionalities like database branching. As developers, the concept of branching is not new to us; you do it all the time whenever you push a new Git branch. Branching is a way of maintaining distinct versions of your application in different states for operational purposes. For instance, you could have a
Devbranch where developers actively work on new features, bug fixes, and experiments,Stagingbranch where all the feature branches (across teams) would be merged after testing, andMainbranch where production-ready features are merged into.
However, a common challenge with branching is that you do not have the same data across different branches. Usually, developers have to write a script to stream data from production to staging or dev to manually synchronize data across multiple environments. Services like Kafka and Pulsar also exist to solve this problem, but they end up adding additional complexity to your setup.

Neon's branching feature allows developers to instantly create copies of their Postgres databases. These copies (branches) are independent and won't affect your production data, yet they share the same data source.

How does it work?
Neon uses a copy-on-write technique to create database branches, meaning that changes to a branch will not modify the original data. Instead, new versions are created as needed. This makes branching fast and efficient and offers additional benefits, such as:
Improved development collaboration
Safe testing of changes
Easier rollbacks
Efficient CI/CD pipelines
Point-in-time restores
How to create branches
There are a couple of different ways to create database branches when working with Neon.
Neon Console: This is the easiest way for manual branching. Simply navigate to the
Branchestab on the side navbar of your Neon console and clickNew Branch.Neon API and CLI: You can also integrate branching into your automation workflows using the Neon API or CLI. This allows for programmatic creation and management of your database branches.
GitHub Actions and Githooks: You can automate branch creation based on events like pull requests or pushes to your Git repository.
Use cases for developers
You can leverage database branching for similar use cases as Git. For instance, you can use it to improve development and testing. You can create branches for feature development, bug fixes, or testing new queries without impacting the production branch.
You can also leverage it as a way to preview your cloud deployments. For instance, you can automatically create branches for each preview deployment to give stakeholders a safe environment in which to test changes.
Data recovery: Roll back to a previous point in time using a point-in-time restore branch.
Testing destructive queries: Safely test potentially risky queries on a branch before running them in production.
As a developer, you may be thinking, this all sounds great — but how do I get started? Let’s get into it.
Getting started
The first step to starting your Neon journey is creating a new account on the Neon console. As a first-time user, you’ll be required to create an account and set up a project, where you’ll specify your project’s name, database name, the Postgres version you want, and a region.

I’ve provided values for my Neon project configurations in the image above. Click the Create project button to complete the creation of your first Neon project. You should get a confirmation screen like below.
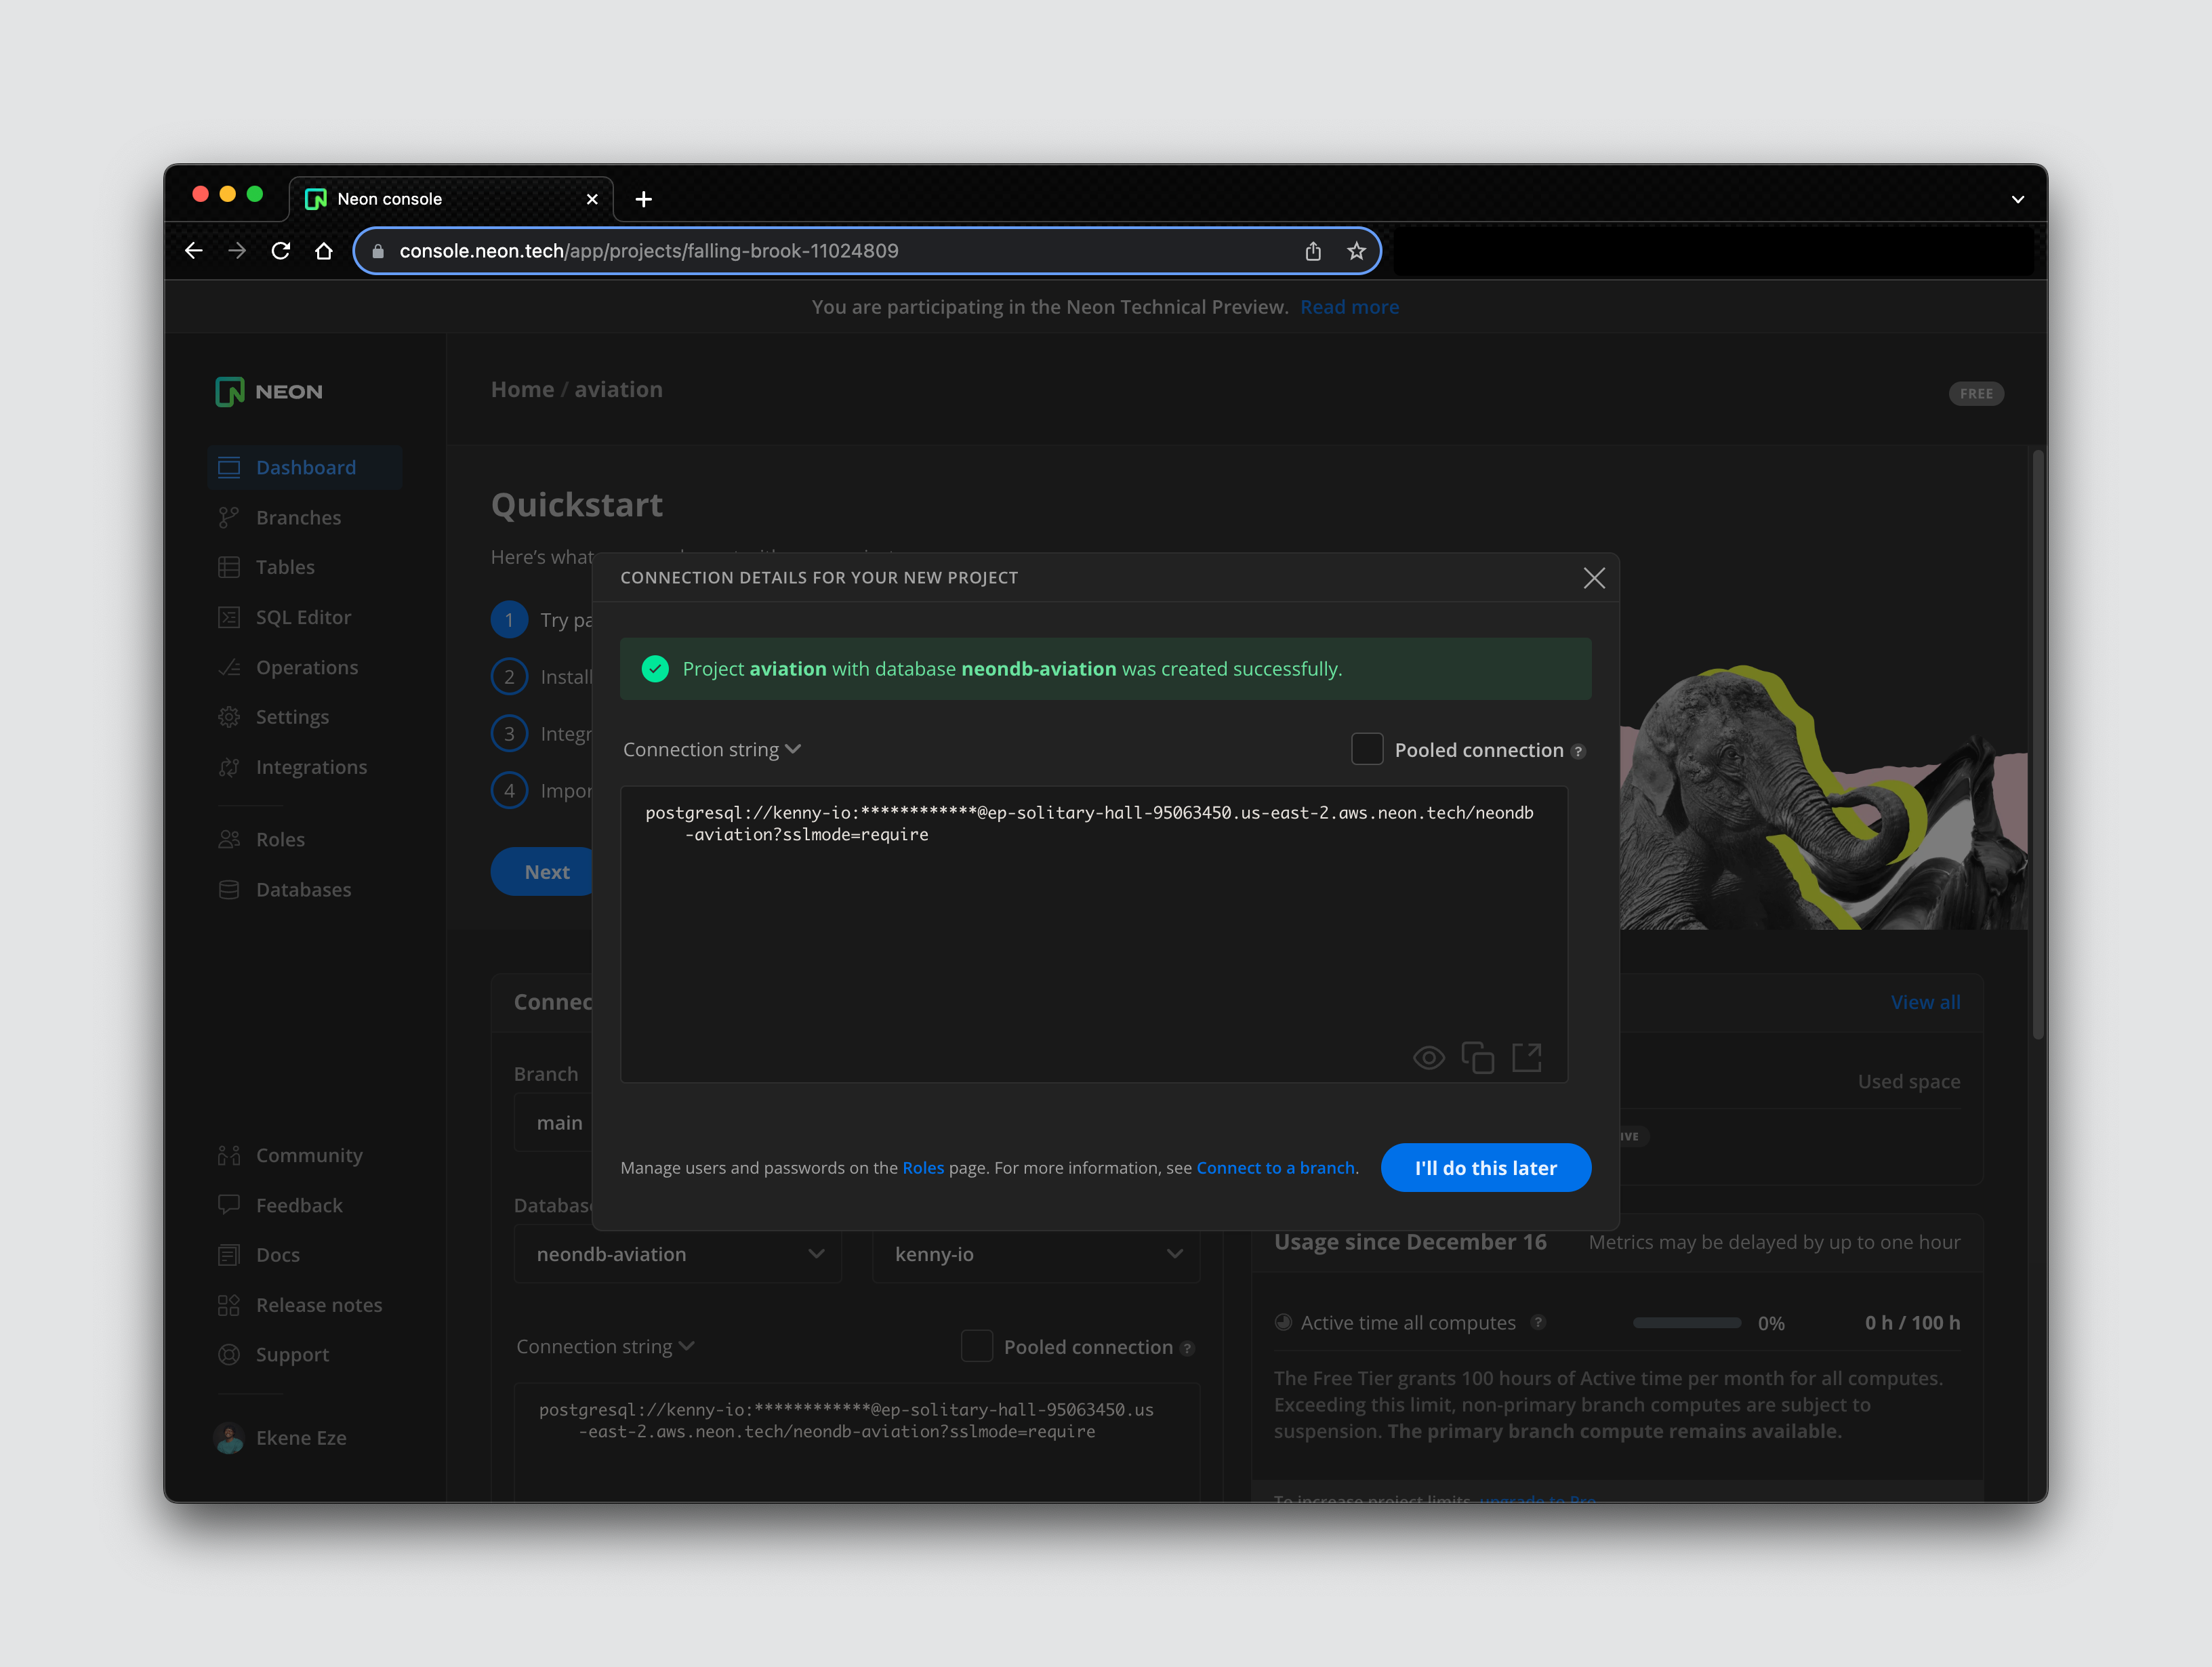
On the confirmation screen, you get access to your database connection string. You’ll need this to connect this database to your external project to power read/write operations.
To create a new branch on this database, navigate to the branches tab on the side navbar and click on it to open the branch creation page.

By default, Neon will provision a main branch for you. Your production data will live here, so we don’t want to mess with that. Let’s create a new dev branch.

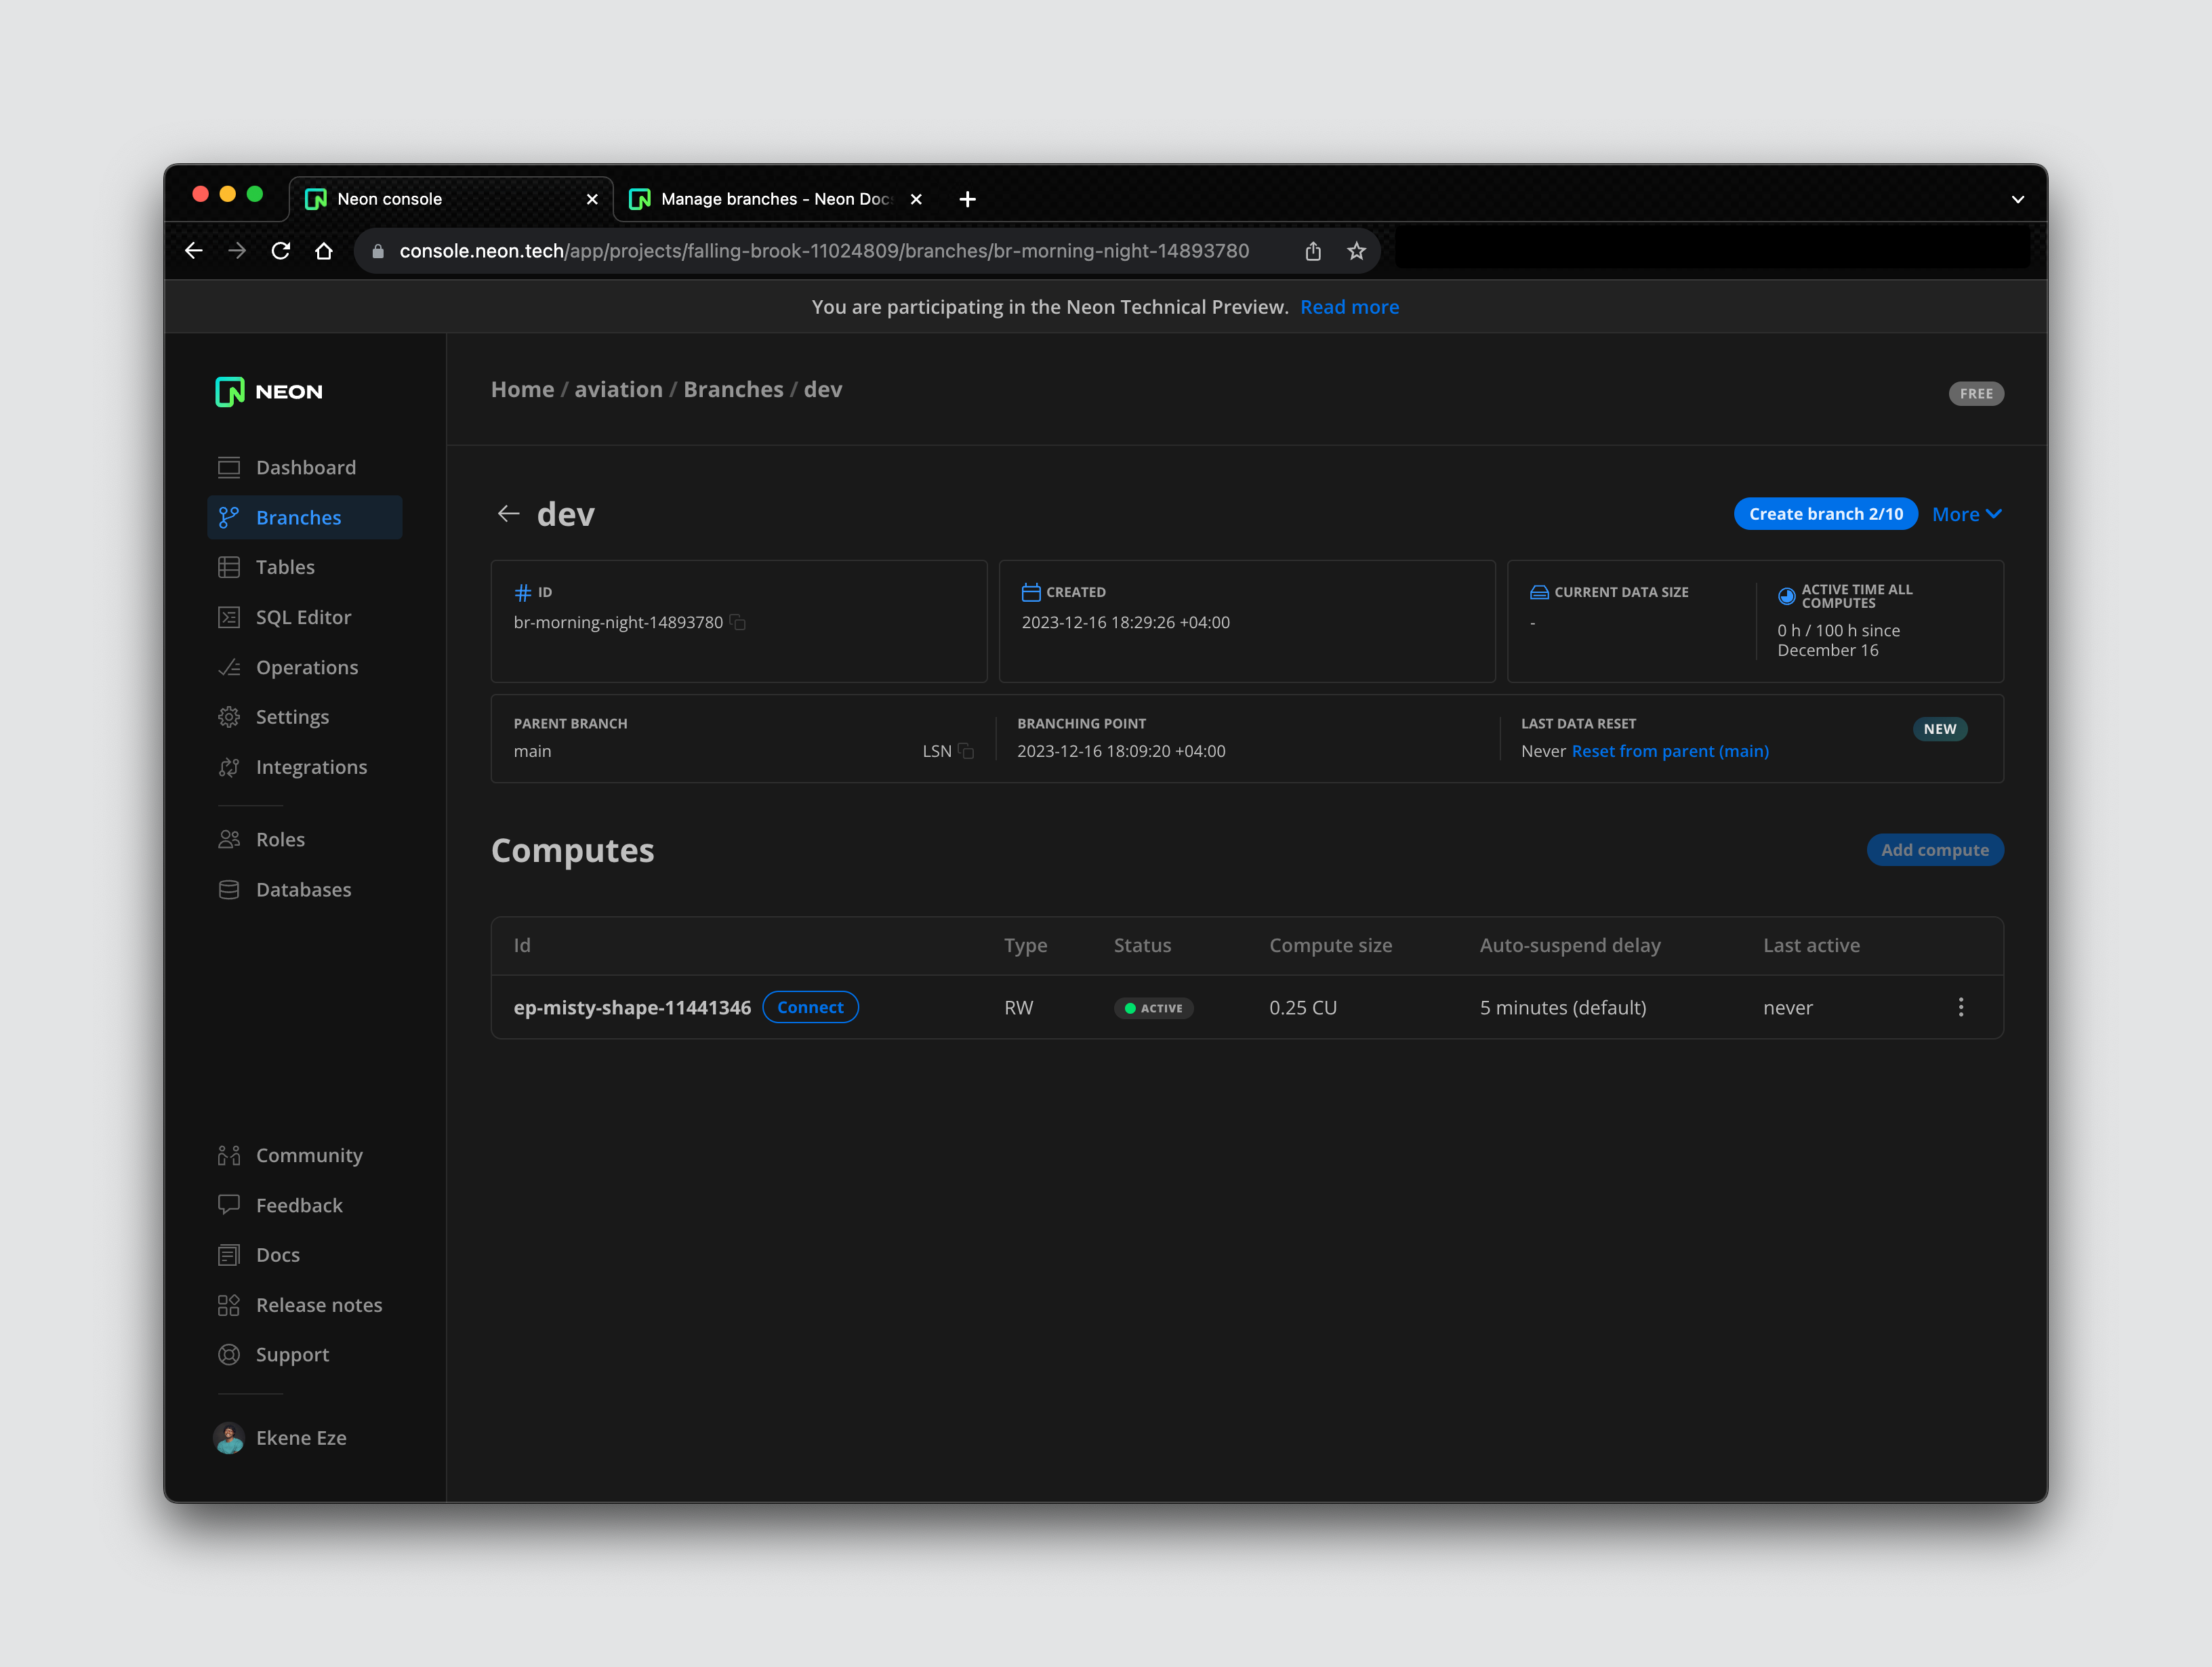
When you create a new branch, you get a new connection string that points to that specific branch to decouple it from the main branch or any other branches that may already exist. If you want to query this new branch, you can easily do that using the generated connection string.
This new branch will also come with an active compute attached and some information about the state of the branch, like the creation time, data size, etc.
Now that we have a dev branch set up, we need to set up permissions and roles so that we can give the right access to different users as they try to query the database. Navigate to the Roles section on the side navbar to create a new role. You can think of a role as the permission a user should have to access the database.
Let’s create a dev role that will be assigned to developers who will be interacting with this database on the dev branch.
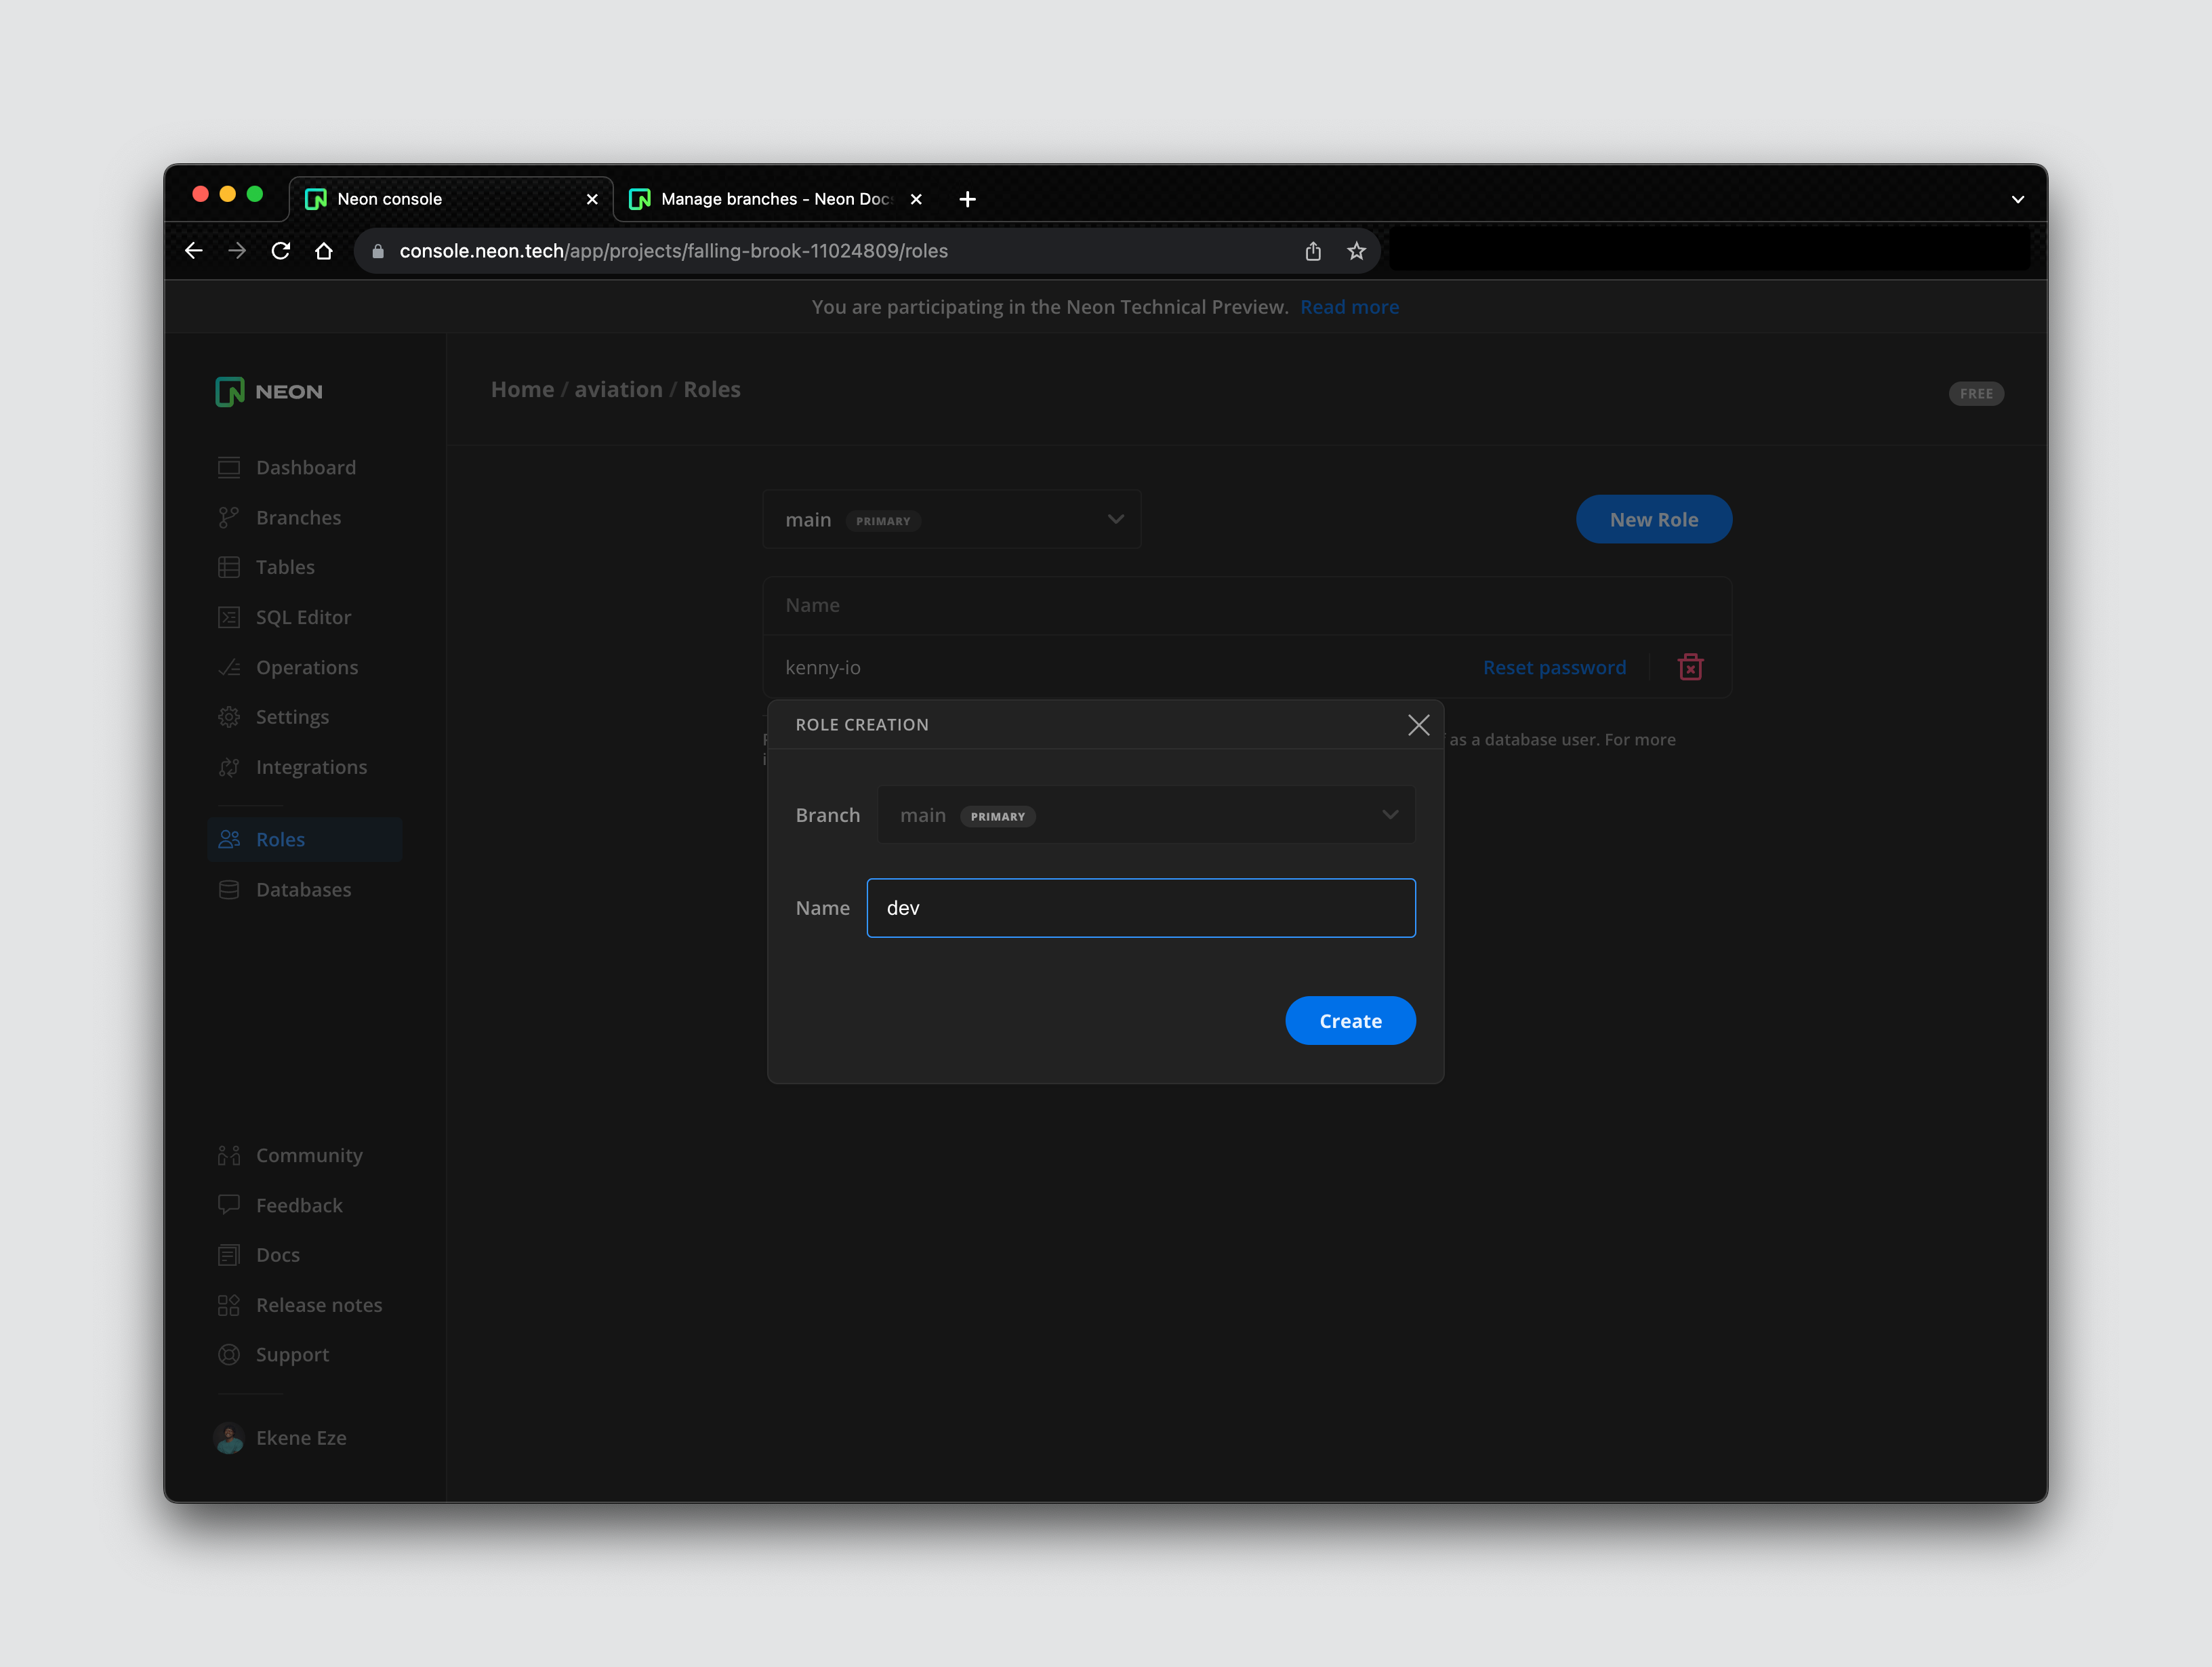
The dev role will provide the right database permissions for any user assigned to this role. When the role is created, you get access to a password and a .env file that contains your access credentials.
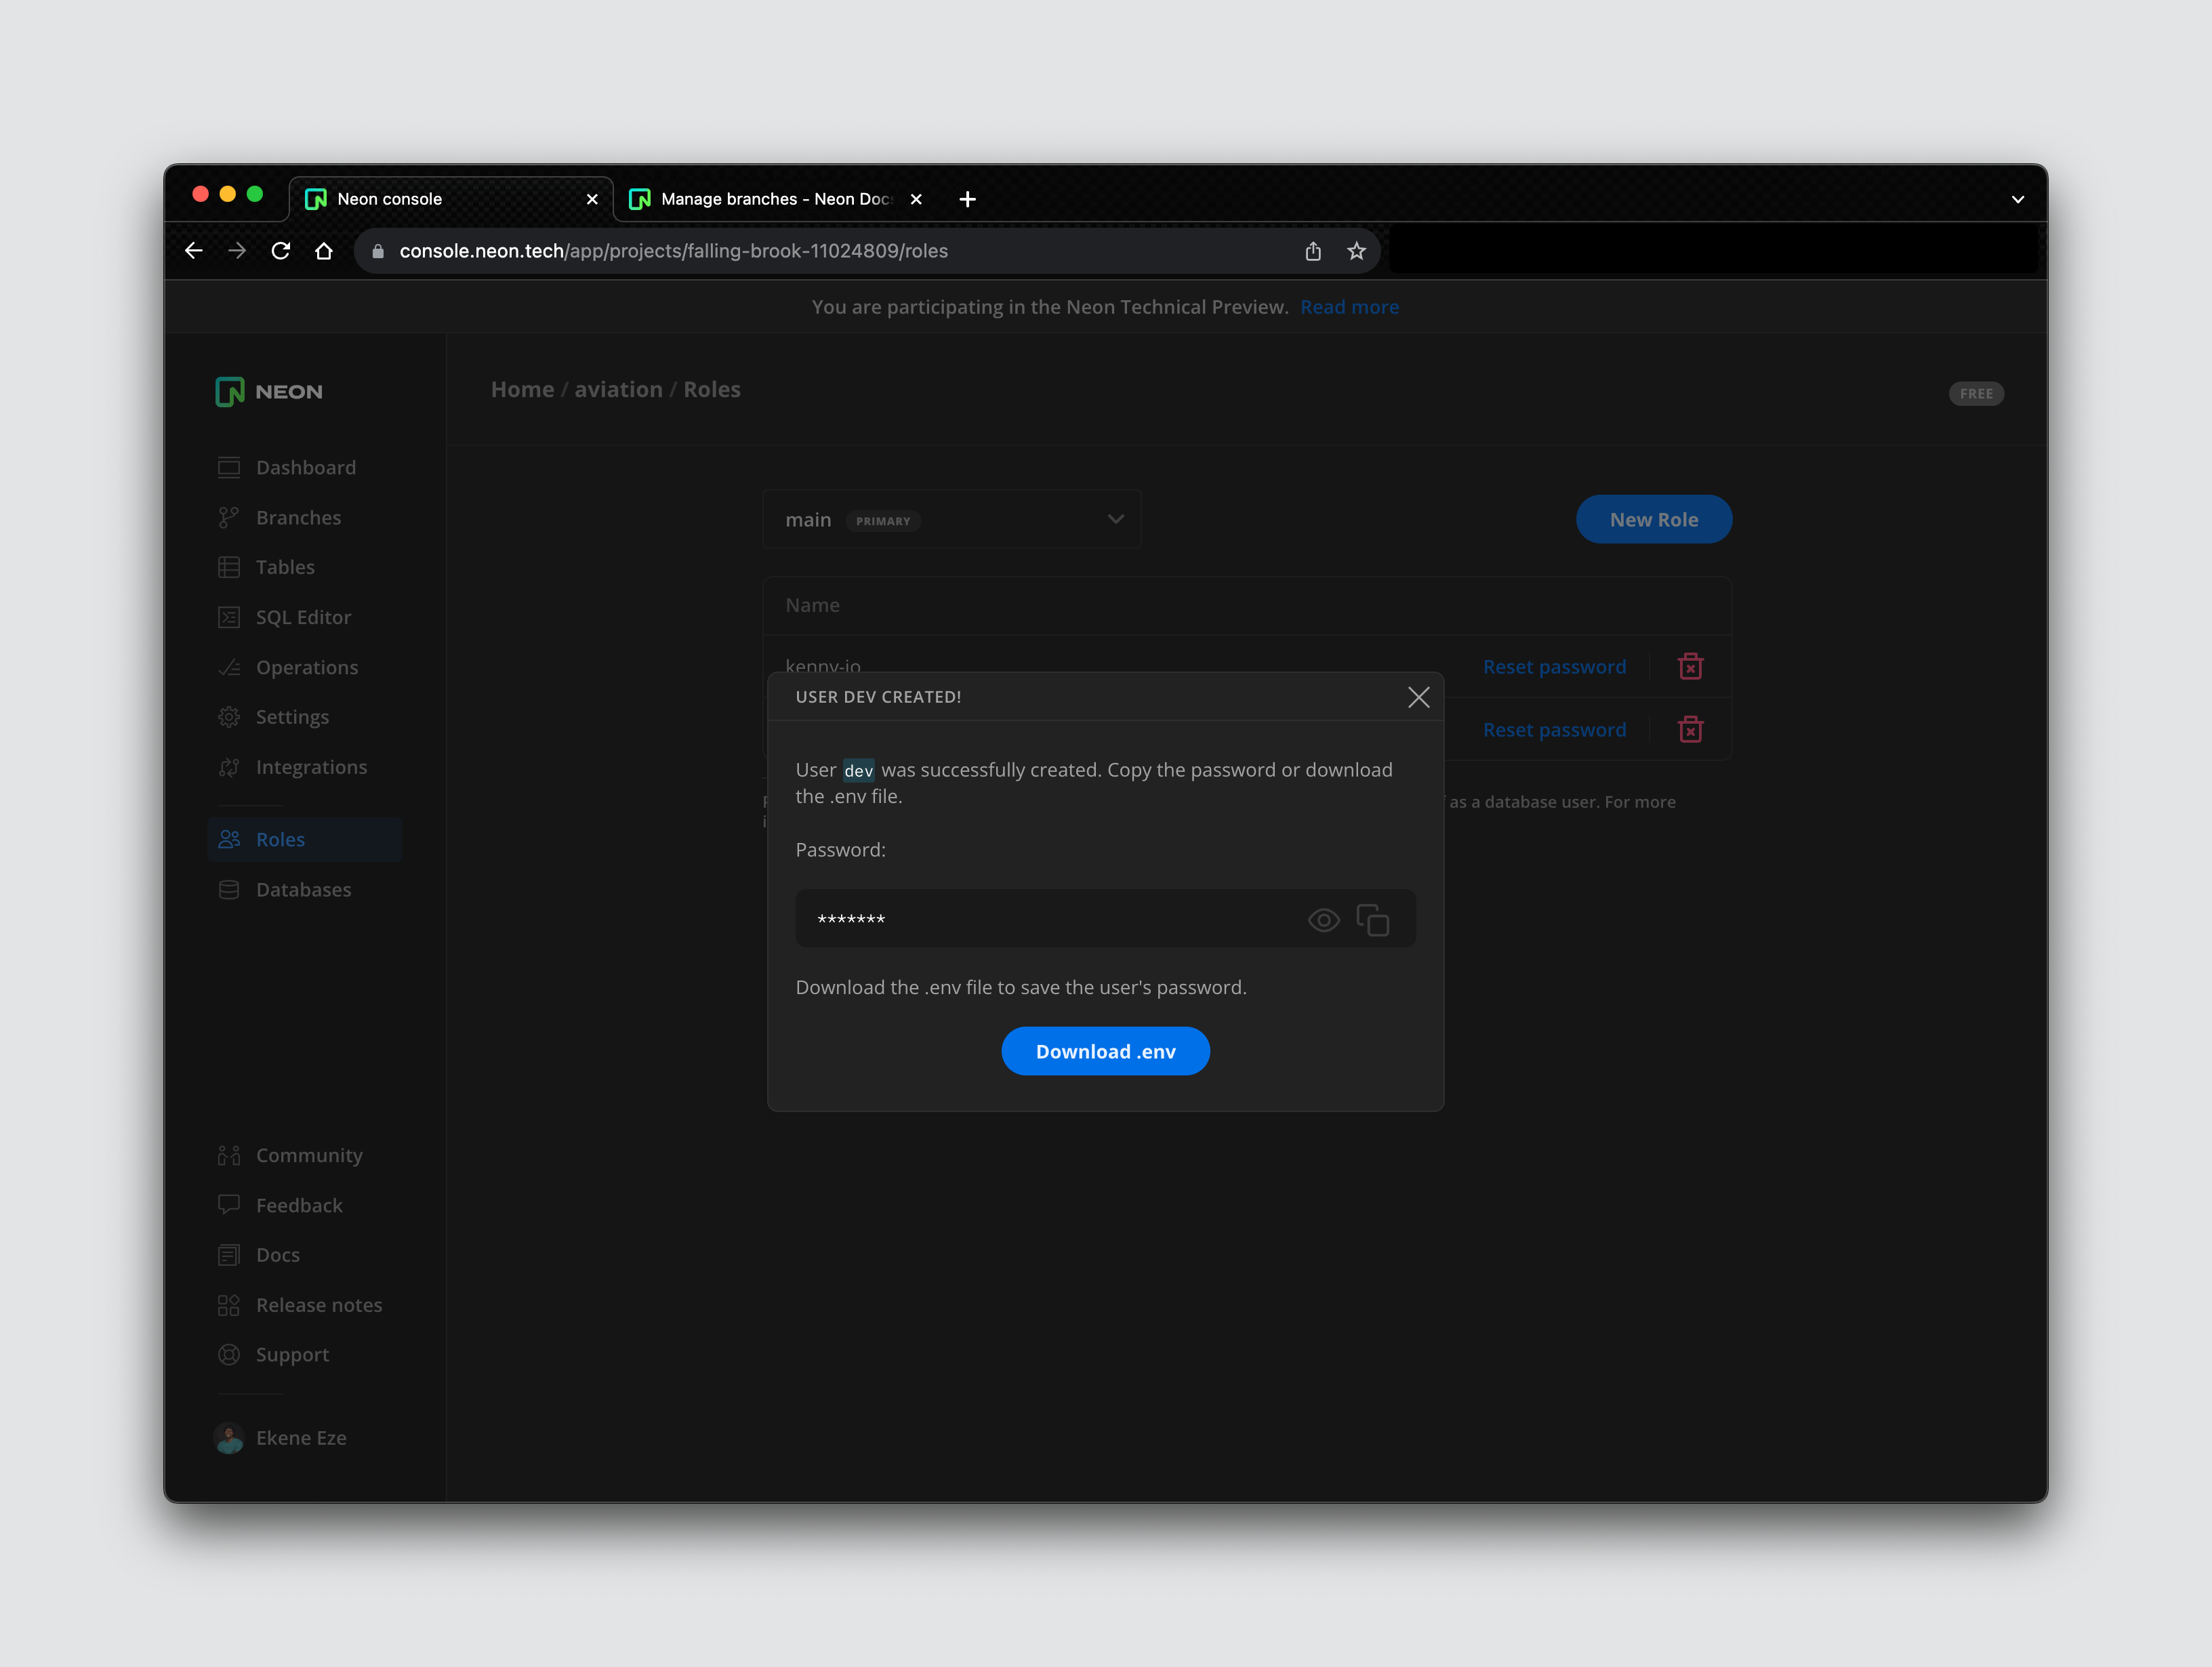
Save this password and download the .env file just in case you lose your password. With this, you can now load sample data into the dev branch by clicking on the SQL editor on the side nav and running the sample SQL query in the editor.
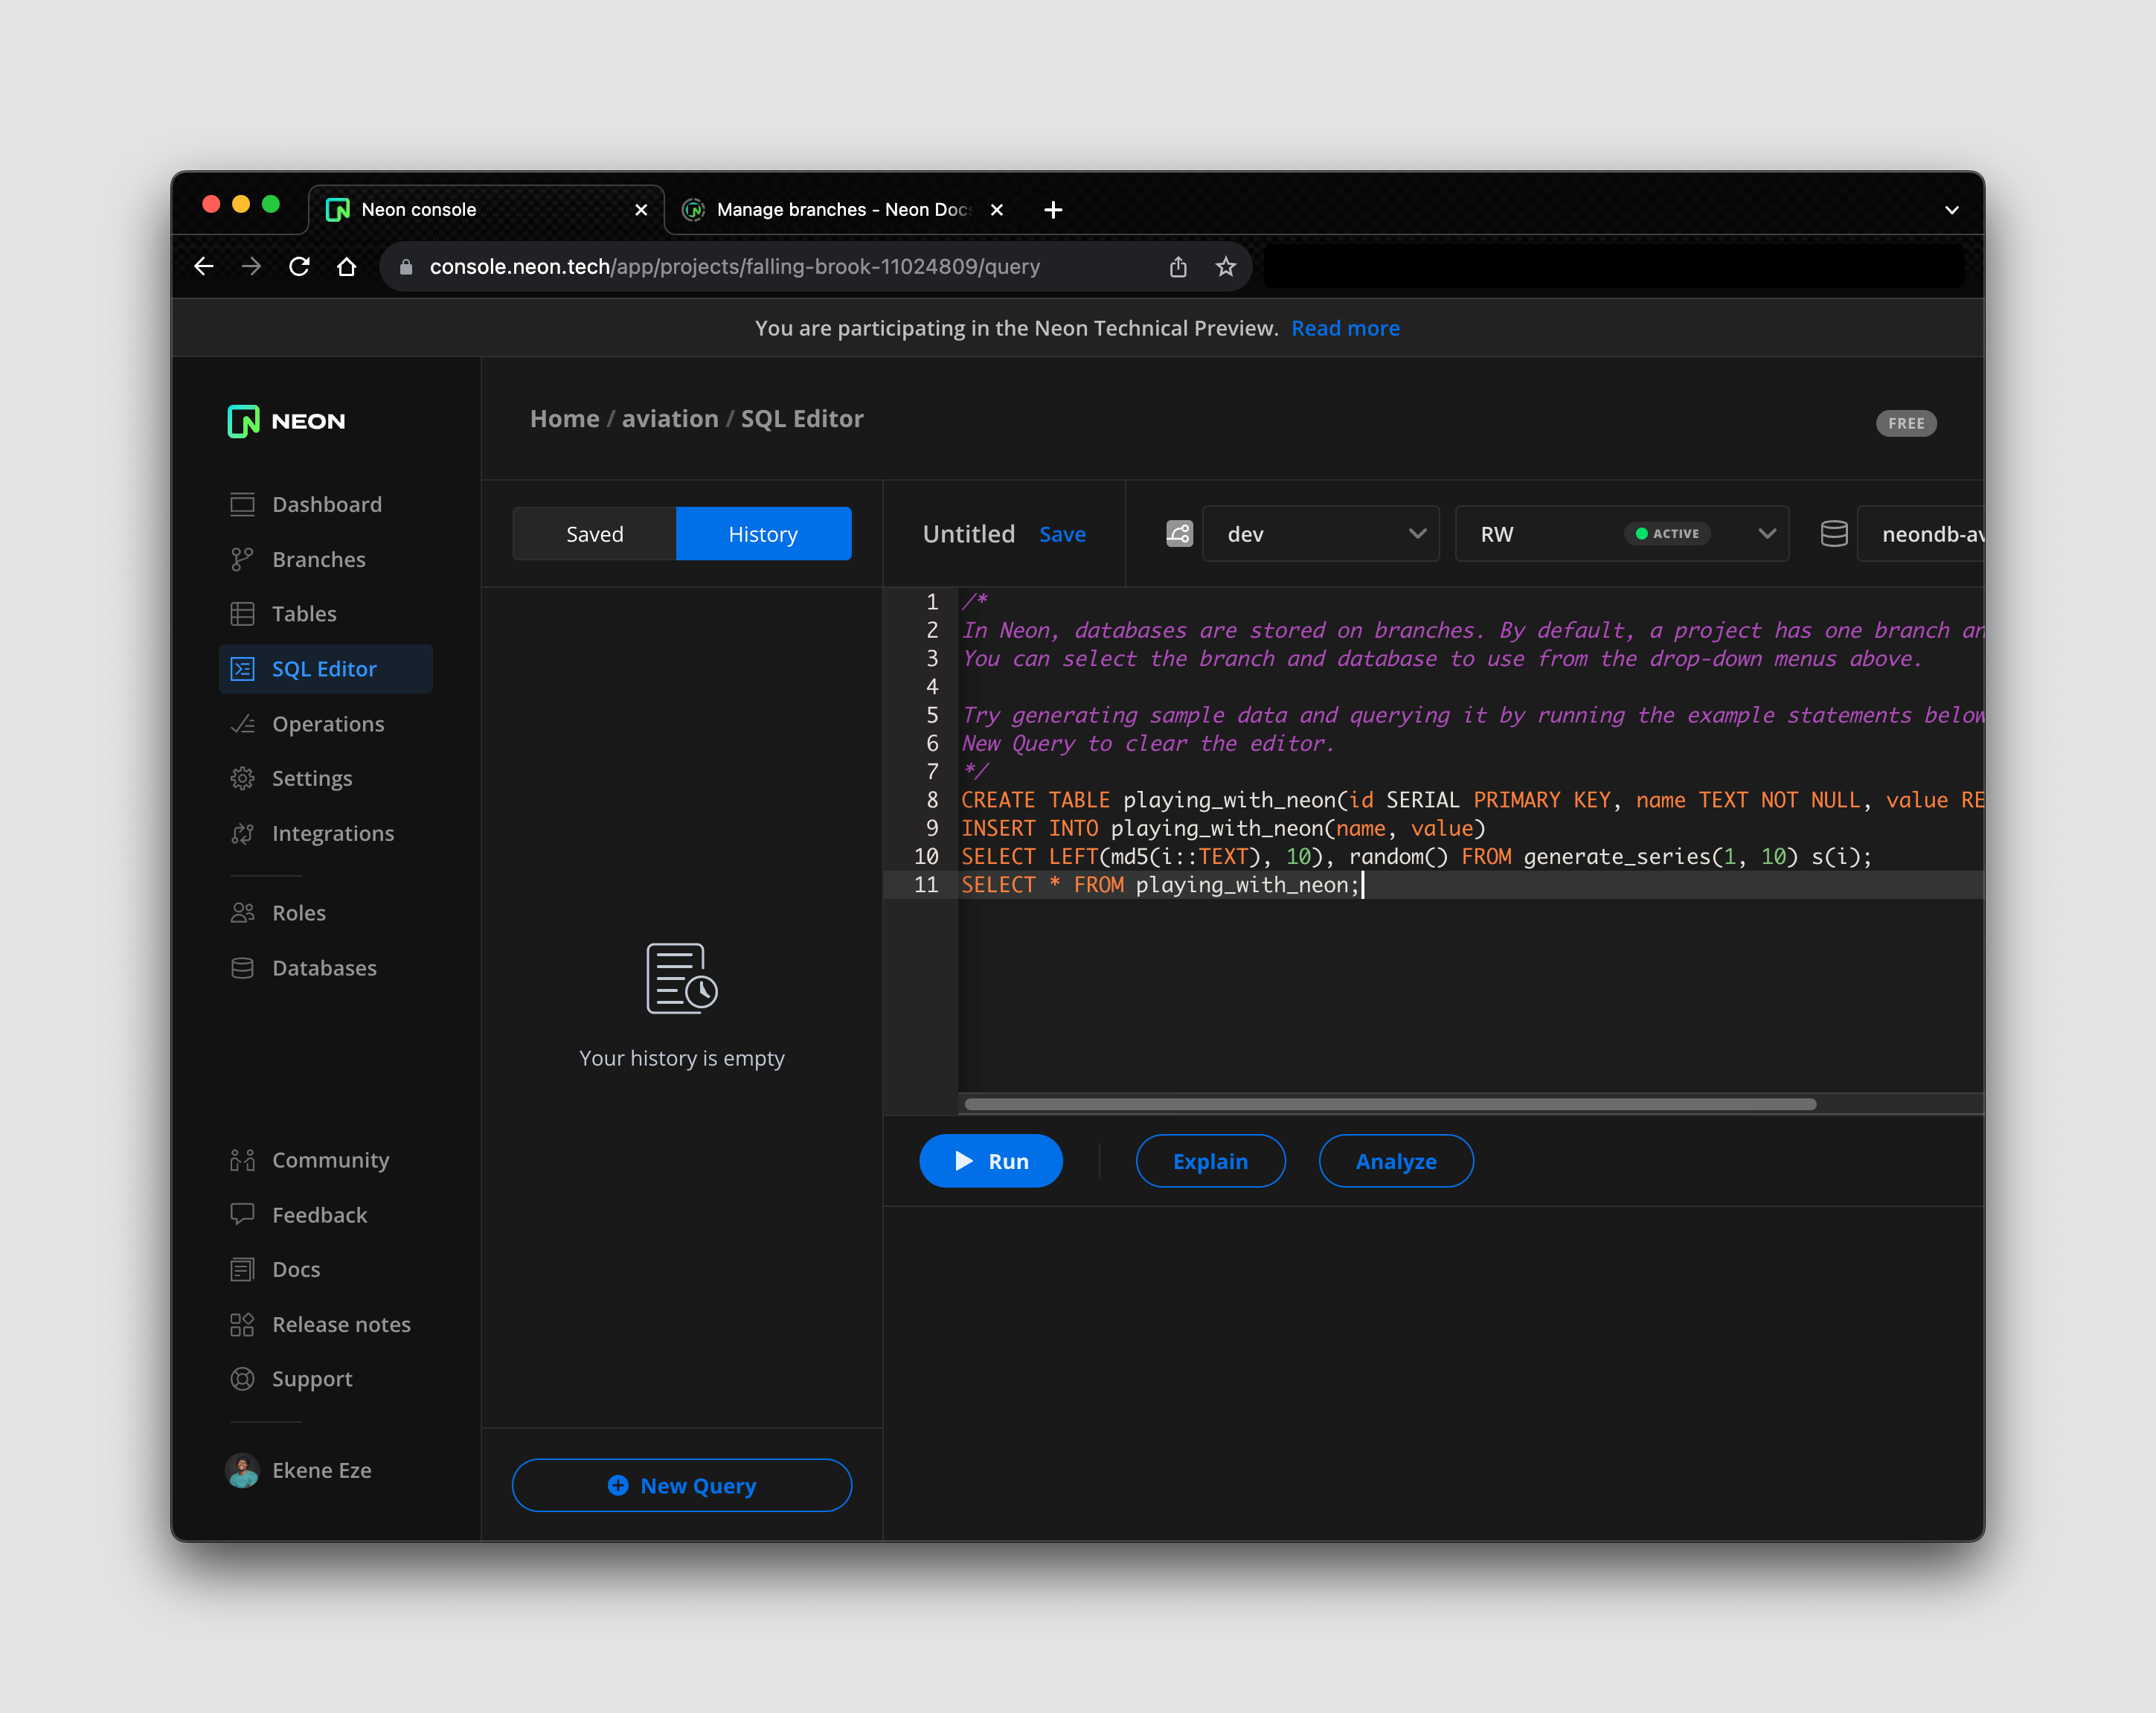
This query will create a playing_with_neon table and populate it with sample data containing id, name, and value. To see this table and the data, navigate to the Tables tab on the sidebar and select the table we created.

From here on, you can continue working on your project, adding custom data, CRUD operations, setting up more roles and permissions, running migrations, etc.
Conclusion
In this post, we’ve gone over Neon’s foundations to better understand the problem it solves and the innovation behind the product. We saw how it improves upon traditional Postgres architectures and what benefits it offers. We also explored the Neon database branching feature to highlight some of its functionalities, benefits, and the role they play in improving your workflow and developer experience.


